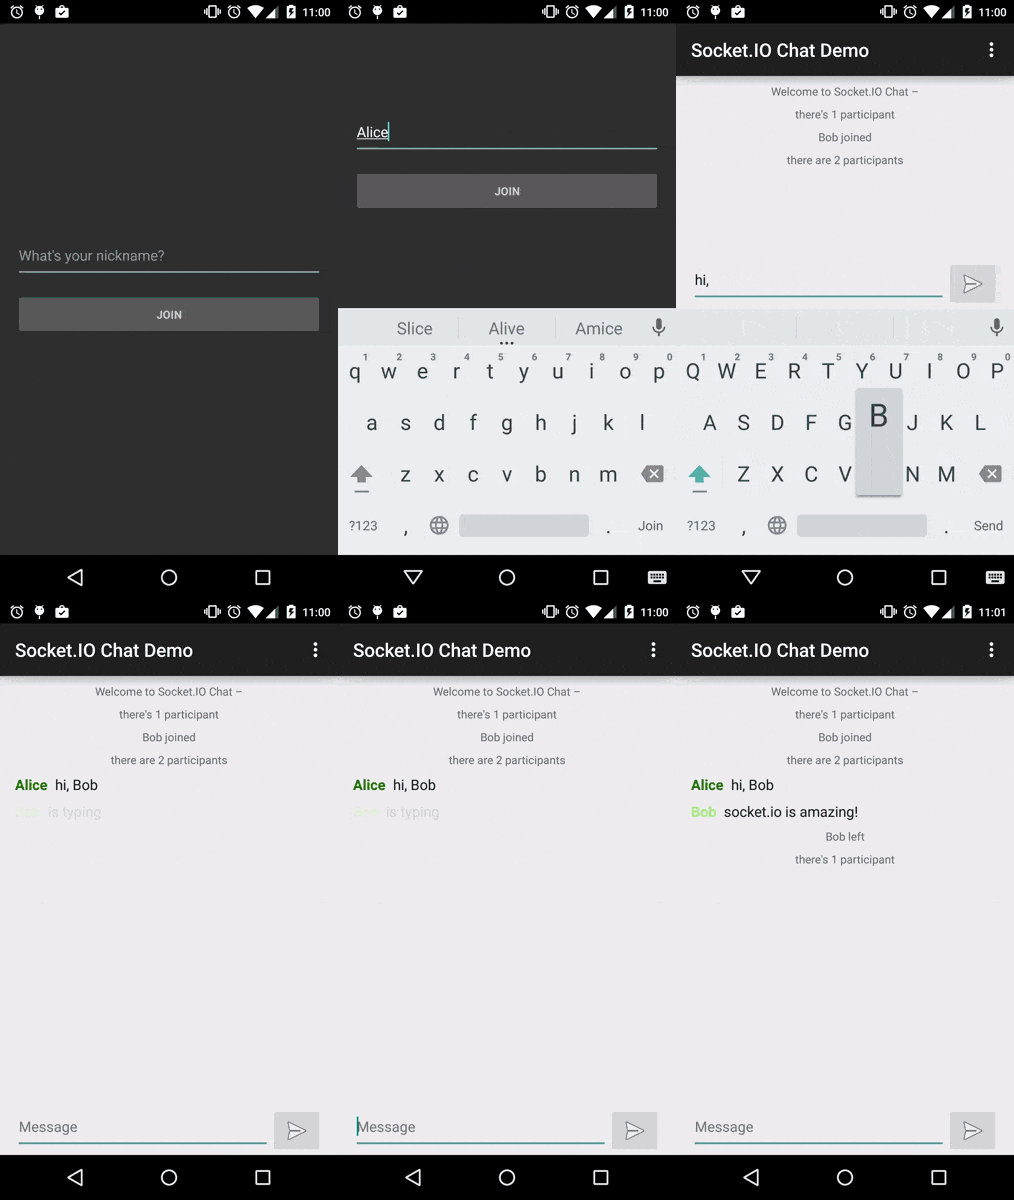
In this tutorial well learn how to create a chat client that communicates with a Socket.IO Node.JS chat server, with our native Android Client! If you want to jump straight to the code, it's on GitHub. Otherwise, read on!
Introduction
To follow along, start by cloning the repository: socket.io-android-chat.
The app has the following features:
- Sending a message to all users joining to the room.
- Notifies when each user joins or leaves.
- Notifies when an user start typing a message.
Socket.IO provides an event-oriented API that works across all networks, devices and browsers. It's incredibly robust (works even behind corporate proxies!) and highly performant, which is very suitable for multiplayer games or realtime communication.
Installing the Dependencies
The first step is to install the Java Socket.IO client with Gradle.
For this app, we just add the dependency to build.gradle:
dependencies {
    implementation ('io.socket:socket.io-client:2.0.0') {
        exclude group: 'org.json', module: 'json'
    }
}
We must remember adding the internet permission to AndroidManifest.xml.
<!-- app/AndroidManifest.xml -->
<manifest xmlns:android="http://schemas.android.com/apk/res/android">
    <uses-permission android:name="android.permission.INTERNET" />
    ...
</manifest>
And also enable the "Clear text traffic in the application section" (Only for new versions o android)
<!-- app/AndroidManifest.xml -->
<manifest xmlns:android="http://schemas.android.com/apk/res/android">
    <uses-permission android:name="android.permission.INTERNET" />

    <application
        android:allowBackup="true"
        android:dataExtractionRules="@xml/data_extraction_rules"
        android:fullBackupContent="@xml/backup_rules"
        android:icon="@mipmap/ic_launcher"
        android:label="@string/app_name"
        android:roundIcon="@mipmap/ic_launcher_round"
        android:supportsRtl="true"
        android:theme="@style/Theme.CaptureAIT"
        android:usesCleartextTraffic="true"
        tools:targetApi="31">

        ...

        </application>
</manifest>
Now we can use Socket.IO on Android!
Using socket in Activity and Fragment
First, we have to initialize a new instance of Socket.IO as follows:
import io.socket.client.IO;
import io.socket.client.Socket;

private Socket mSocket;
{
    try {
        mSocket = IO.socket("http://chat.socket.io");
    } catch (URISyntaxException e) {}
}

@Override
public void onCreate(Bundle savedInstanceState) {
    super.onCreate(savedInstanceState);
    mSocket.connect();
}
IO.socket() returns a socket for http://chat.socket.io with the default options. Notice that the method caches the result, so you can always get a same Socket instance for an url from any Activity or Fragment.
And we explicitly call connect() to establish the connection here (unlike the JavaScript client). In this app, we use onCreate lifecycle callback for that, but it actually depends on your application.
Emitting events
Sending data looks as follows. In this case, we send a string but you can do JSON data too with the org.json package, and even binary data is supported as well!
private EditText mInputMessageView;

private void attemptSend() {
    String message = mInputMessageView.getText().toString().trim();
    if (TextUtils.isEmpty(message)) {
        return;
    }

    mInputMessageView.setText("");
    mSocket.emit("new message", message);
}
Listening on events
Like I mentioned earlier, Socket.IO is bidirectional, which means we can send events to the server, but also at any time during the communication the server can send events to us.
We then can make the socket listen an event on onCreate lifecycle callback.
@Override
public void onCreate(Bundle savedInstanceState) {
    super.onCreate(savedInstanceState);

    mSocket.on("new message", onNewMessage);
    mSocket.connect();
}
With this we listen on the new message event to receive messages from other users.
import io.socket.emitter.Emitter;

private Emitter.Listener onNewMessage = new Emitter.Listener() {
    @Override
    public void call(final Object... args) {
        getActivity().runOnUiThread(new Runnable() {
            @Override
            public void run() {
                JSONObject data = (JSONObject) args[0];
                String username;
                String message;
                try {
                    username = data.getString("username");
                    message = data.getString("message");
                } catch (JSONException e) {
                    return;
                }

                // add the message to view
                addMessage(username, message);
            }
        });
    }
};
This is what onNewMessage looks like. A listener is an instance of Emitter.Listener and must be implemented the call method. Youll notice that inside of call() is wrapped by Activity#runOnUiThread(), that is because the callback is always called on another thread from Android UI thread, thus we have to make sure that adding a message to view happens on the UI thread.
Managing Socket State
Since an Android Activity has its own lifecycle, we should carefully manage the state of the socket also to avoid problems like memory leaks. In this app, we’ll close the socket connection and remove all listeners on onDestroy callback of Activity.
@Override
public void onDestroy() {
    super.onDestroy();

    mSocket.disconnect();
    mSocket.off("new message", onNewMessage);
}
Calling off() removes the listener of the new message event.
Further reading
If you want to explore more, I recommend you look into:
Other features of this app. They are just implemented with
emit(),on()andoff().The documentation of the Java Socket.IO client
Many other great Socket.IO implementations created by the community!
